jtsrace
Tenative First Steps

Posts: 62
|
Post by jtsrace on Dec 28, 2012 23:44:56 GMT -6
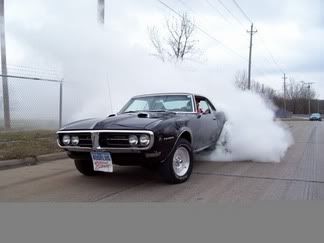
So.. the story goes like this.. Man has T/A, man gets married and has kids, mans T/A gets parked, 24 years later kid brings back dads T/A with a modern kick!! This is our project in the works, 1978 Trans Am powered by a cammed LQ4, Turning a T56.
Here is a link to our progress....
PICTURES AND BUILD BELOW!!! (post 7)
|
|
|
|
Post by norotor on Dec 29, 2012 0:54:38 GMT -6
Very cool!
Jesse
|
|
|
|
Post by 95GT on Dec 29, 2012 7:30:39 GMT -6
Damn it! The link doesn't work. I would love to see this car!  |
|
|
|
Post by patriotformula on Dec 29, 2012 8:57:02 GMT -6
Oh shit.... Bandit Trans Ams ttmff
|
|
|
|
Post by thirdgen60 on Dec 29, 2012 14:50:17 GMT -6
Nice work! That thing sound pretty healthy  I fixed the link for you as well |
|
|
|
Post by ieatz28 on Dec 30, 2012 23:16:50 GMT -6
Can't get the link to work. 70-81 trans am is my second favorite car first being 68-72 chevelle
|
|
|
|
Post by noslowzee1 on Jan 2, 2013 9:17:11 GMT -6
I wish I still had the 72 heavy Chevy chevelle and the 81 z28 that I used to have. They would both be LS swapped by now.
|
|
jtsrace
Tenative First Steps
Posts: 62
|
Post by jtsrace on Jan 3, 2013 22:41:00 GMT -6
So here is how it all started... I was at a car dealership in Dewitt and noticed this lonely 6.0 sitting against the back wall, long story short I ended up taking it home for core price  all though I was not sure what I was going to do with it...Maybe Dads 78 Trans Am!  The car, (this term "car" is used loosely as a singular item, there is actually two cars in this story, the original blue 78 trans am and a black 79 trans am, the 79 is becoming the 78 because of better condition...) back to the story, the sub frame needed to be blasted to bare metal and painted,(POR15=awesome!), as well as update the rubber bushings, ball joints, springs, etc... Here are some pics of it...   ... and new brakes  The original plan for the drive train was to use the original Super T10 four speed, using a Keisler LS "621" big block bell housing, McLeod .400" thicker flywheel, a Centerforce clutch, and mechanical clutch linkage using a SDPC pivot ball bracket. (This was all scrapped out in favor for a 04 GTO T56, ill get to it later)  Here you can see where the pivot ball attaches for the mechanical clutch. I was also planning on using stock FBody exhaust manifolds,(stainless manifolds in picture). You may also notice the Zbar linkage seems to interfere with the manifolds, it looked like it would be close, but I think it would have worked, (Changed exhaust plans, discussed later...)  Stay tuned...more to come! |
|
|
|
Post by ieatz28 on Jan 30, 2013 22:56:08 GMT -6
More please..
|
|
jtsrace
Tenative First Steps
Posts: 62
|
Post by jtsrace on Feb 7, 2013 9:27:12 GMT -6
|
|
jtsrace
Tenative First Steps
Posts: 62
|
Post by jtsrace on Feb 7, 2013 12:02:25 GMT -6
After all the dirty rust work was semi-wrapped up I got back to getting the car more towards the assembled and running condition. I decided to mount the computer in a void inside the driver fender, behind the wheel well. I used a PCM mount from a 99 pickup truck and cut the mounts off the back leaving only the retaining surfaces around the PCM. There is enough material where I could drill a hole and use a decent size self-tapping screw to hold it to the fire wall. You can also see that I began the wire work in the picture. I sourced a lot of the wire info I needed from lt1swap.com, ill get to the wires in a bit.  At this time I also solved the clutch linkage interference with the exhaust manifolds problem, by purchasing a set of Dynatech headers, haha. Theses headers are a great fit and are of good quality, thick flanges, coating is uniformed and smooth, a ball and socket type flange, 02 bungs welded in and ready to go. From the video in the original post, you can see them on the car…ready to go, “kinda.” After extensive searching to determine if these headers worked with a mechanical clutch linkage , I called Summit and the tech there assured me that the headers would work with the mechanical setup, he was wrong, so that took me down a new road to the hydraulic clutch set up...maybe?  For the hydraulic clutch set up, I used an LS FBody master cylinder with a DSE adapter plate that mounted behind the brake booster. For the hydraulic throw out bearing in the ST-10 four speed I opted for a ram heavy duty release bearing kit. This set up looked ok, but plans changed and wasn’t used. |
|
400plus
Wrecked Daddy's Car
Founding Member
Posts: 996
|
Post by 400plus on Feb 7, 2013 18:06:53 GMT -6
Very nice! |
|
|
|
Post by vadorsnake04 on Feb 7, 2013 20:33:38 GMT -6
Getting closer!
|
|
|
|
Post by JIMIDUH on Feb 9, 2013 12:40:43 GMT -6
nice build so far!
|
|
ehodger
Tenative First Steps
Posts: 31
|
Post by ehodger on Feb 23, 2013 13:01:04 GMT -6
Looks like you're making good progress. Keep it up and you will be done before you know it.
|
|


 all though I was not sure what I was going to do with it...Maybe Dads 78 Trans Am!