Post by mosconiac on Apr 11, 2006 9:58:04 GMT -6
Starting with the great information presented in this THREAD, I set out to do a battery relocation.
Here's the stuff I bought (with vendor & approximate prices):
Hifi Sound Connection Website
Summit Website
I wired the system using the "Not for Racing" DIAGRAM as a starting point...with minor changes as indicated in the text below.
Step#1: Mounting the box....
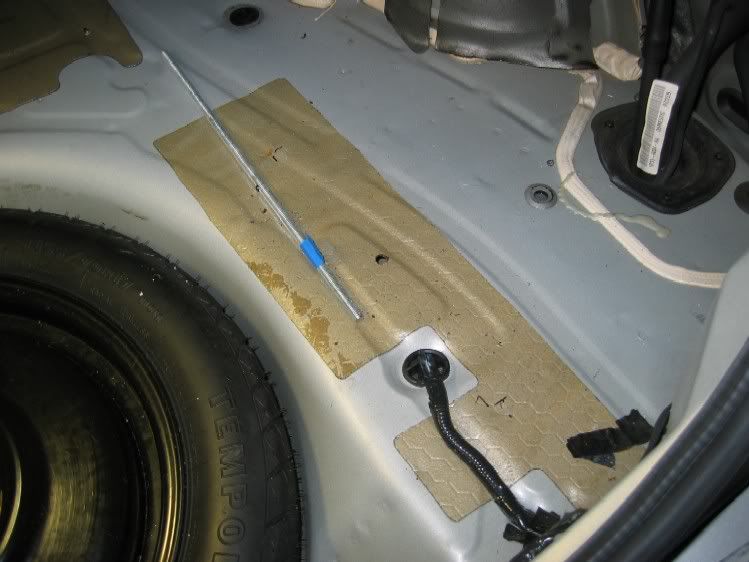
The first step is to carefully select your box location in the trunk. I took about an hour to carefully map my location to make sure I would not penetrate the gas tank when drilling holes. This show shows where my threaded rod would be located.
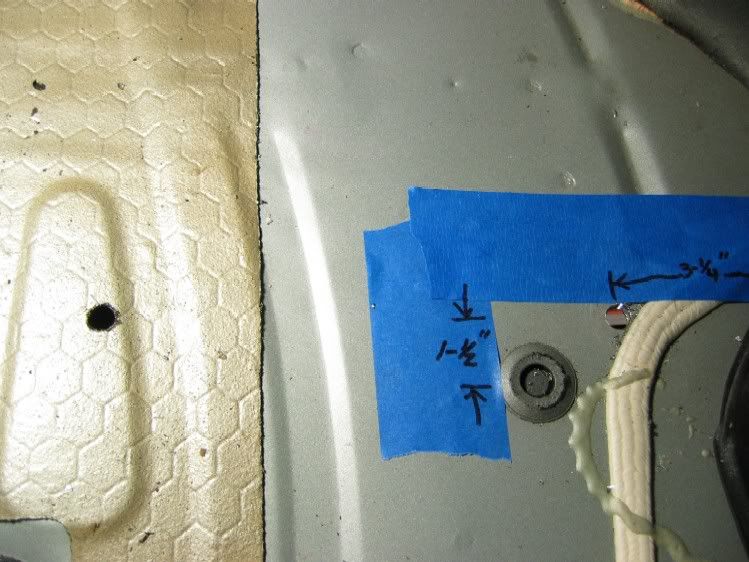
This shots gives you some idea of where I located the rods, dimensionally. To attach the nut on the rod closest to the spare tire (a real SOB), I taped the nylock nut into a wrench and had my wife fish it up under the car until I could see it thru the hole. Then I threaded the rod into it.
You will note that I tucked the grounding point behind the box. I had to trim the trunk panel a smidge to fit around the 1/0AWG ground.
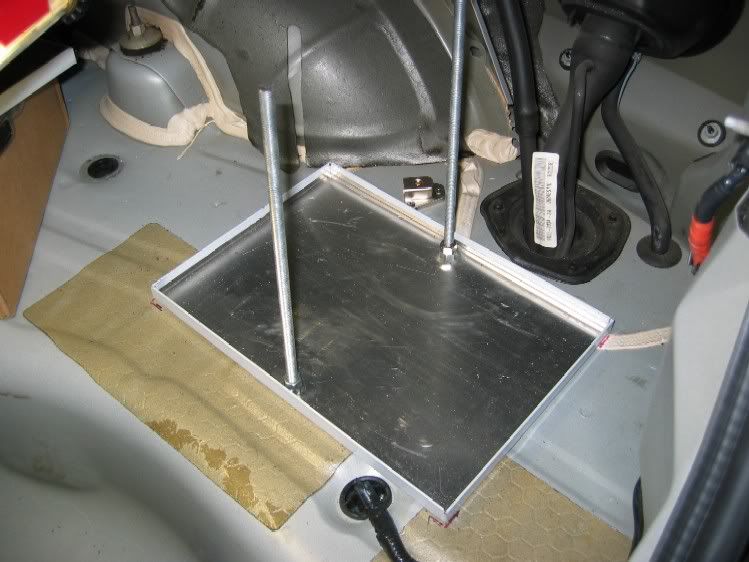
Here's the completed box installation. You can't quite see it, but I ran the vent tube thru the grommet just forward of the box.

Step#2: Removing OEM wires....
I cut the OEM battery/starter harnesses away and reconnected the OEM ground cable to the new grounding point, which I mounted next to the power distribution box under the hood.

I cut and abandoned the starter cable in the loom...its impossible to remove it because it is taped to other conductors the length of the cable. This will now be a dead cable, so there is no concern with electrical safety.
This is the 4AWG ground terminal.
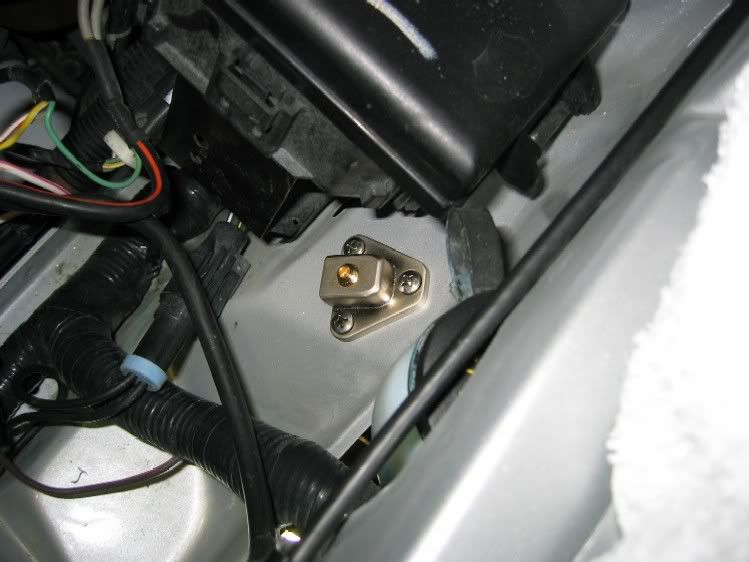
This is what the old battery location looks with the ground installed, but the new power wire yet to be installed.
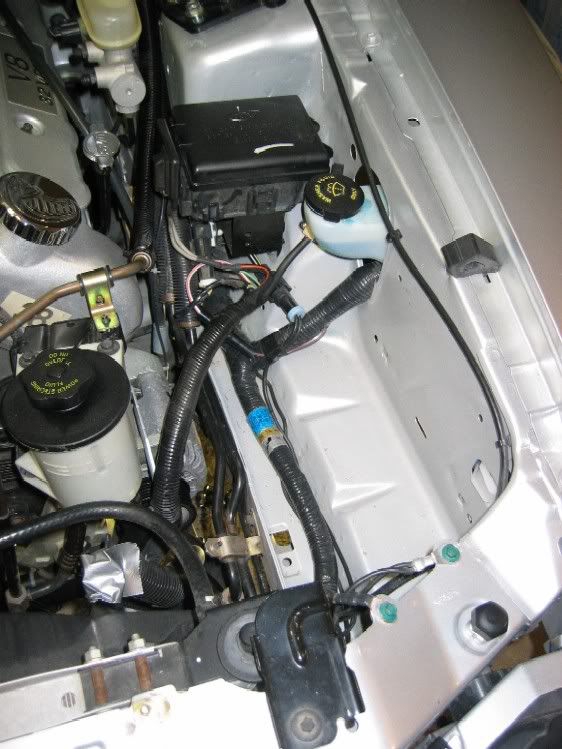
Step#3: Running starter cable & mounting solenoid....
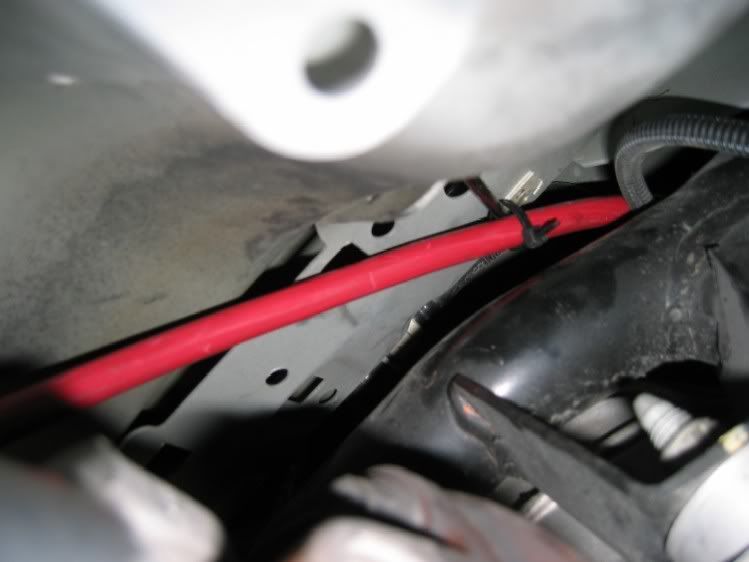
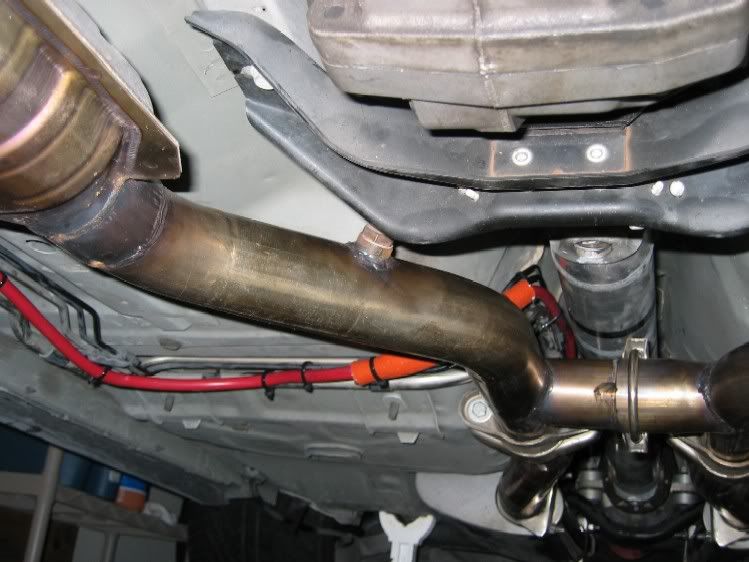
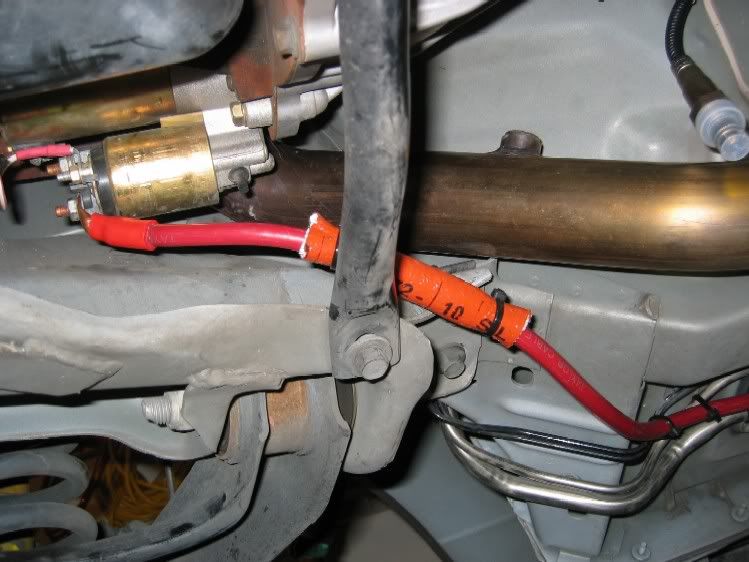
I knew I wanted to mount the solenoid in the spare tire well...and I wanted to the ability to put the sapre tire in for extended trips, so I ran the 1AWG starter cable around there. This let me use the IRS bracing on the other side of the trunk metal for support. The reason I used the Taylor 1AWG is it is *stiffer* than typical car audio cable so it could be trained to hug the under side of the car and not flop into the exhaust or other dangers.
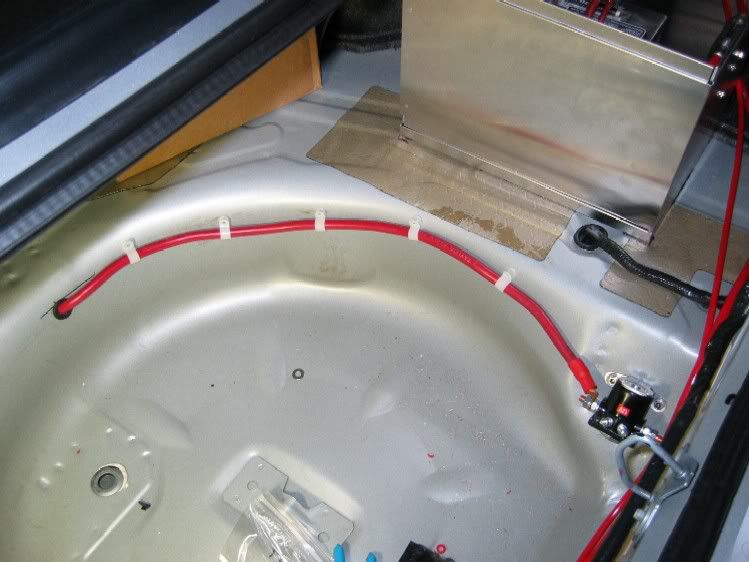
I just followed the OEM fuel/gas vapor lines to the starter and used some "flame guard" near the mufflers for extra heat protection.
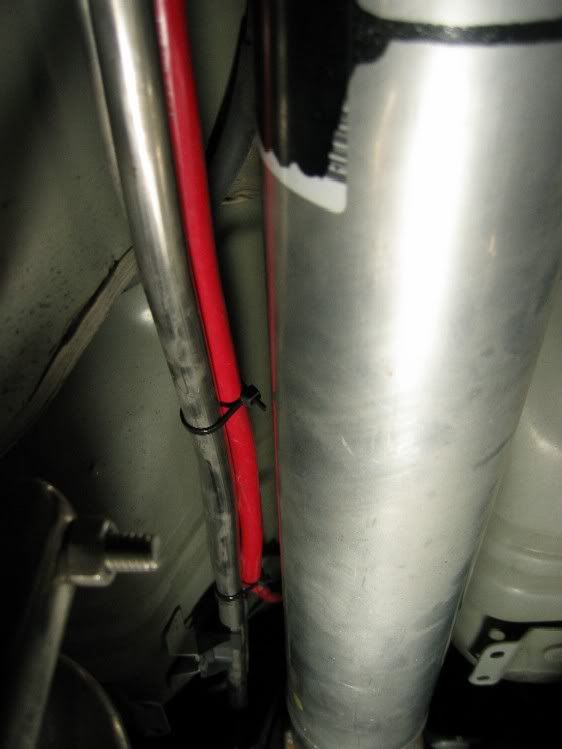
Step#4: Running charging cable & mounting fuses....
I ran the 4AWG cable to the front of the vehicle as follows. The 8AWG cable coiled up there is for the future BAP installation.
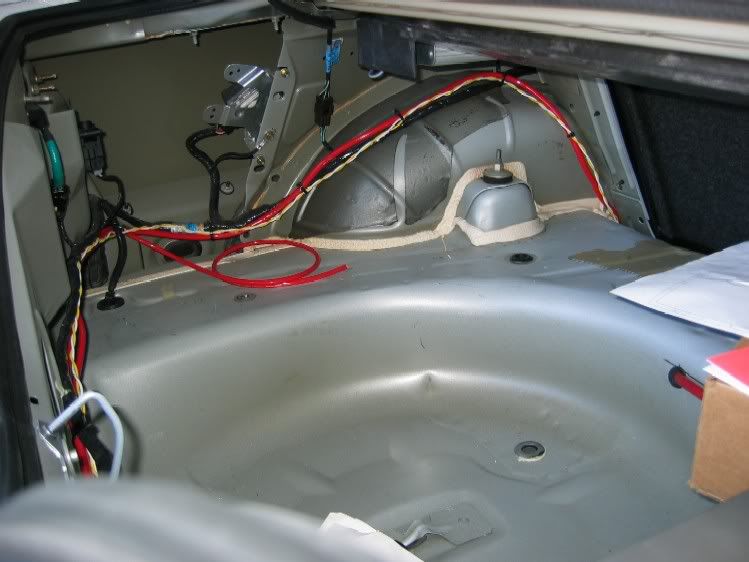
Rear seat area.
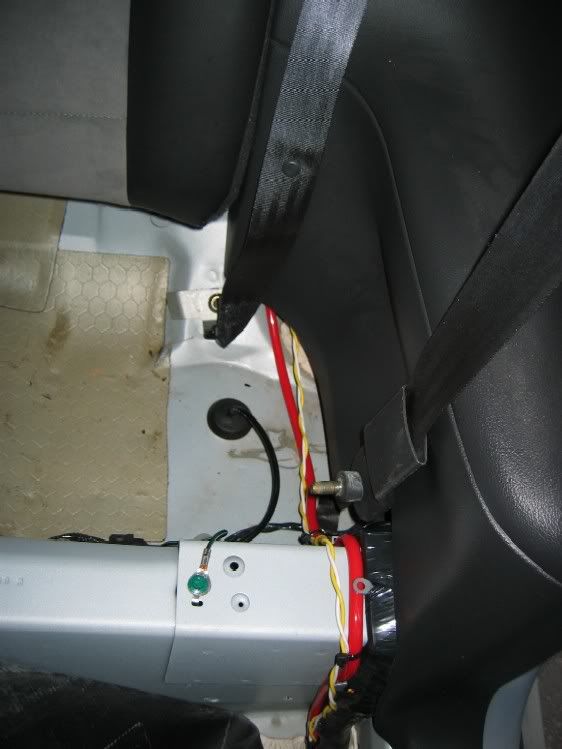
Thru the kickpanel.
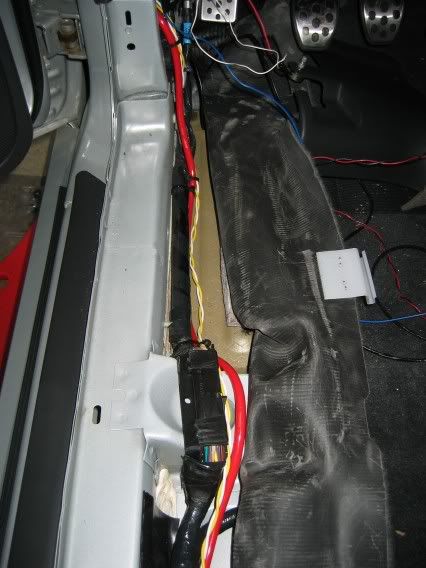
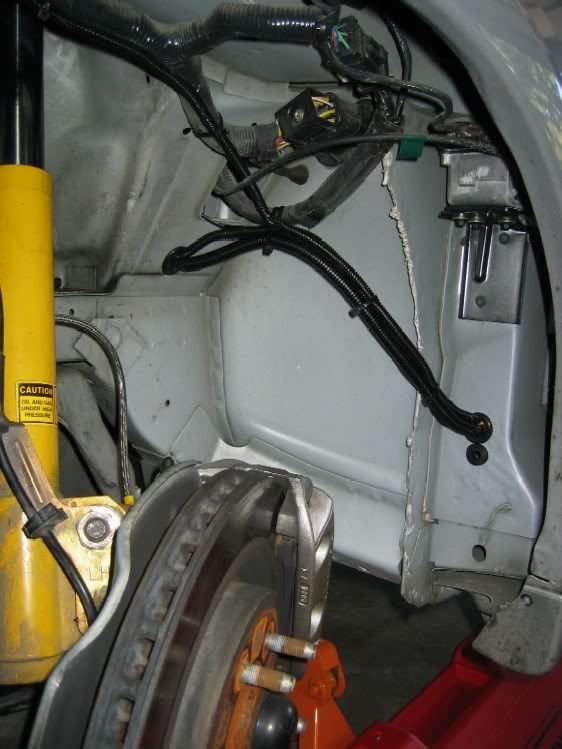
Thru the wheel well.
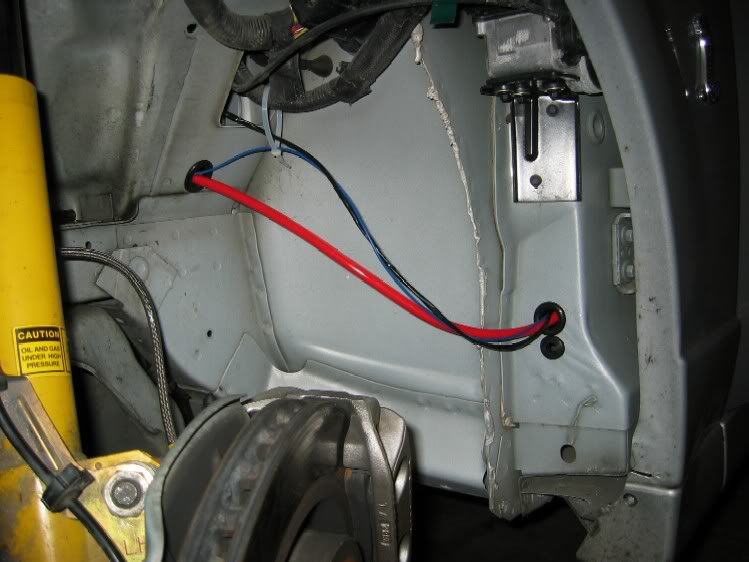
Final wheel well installation.
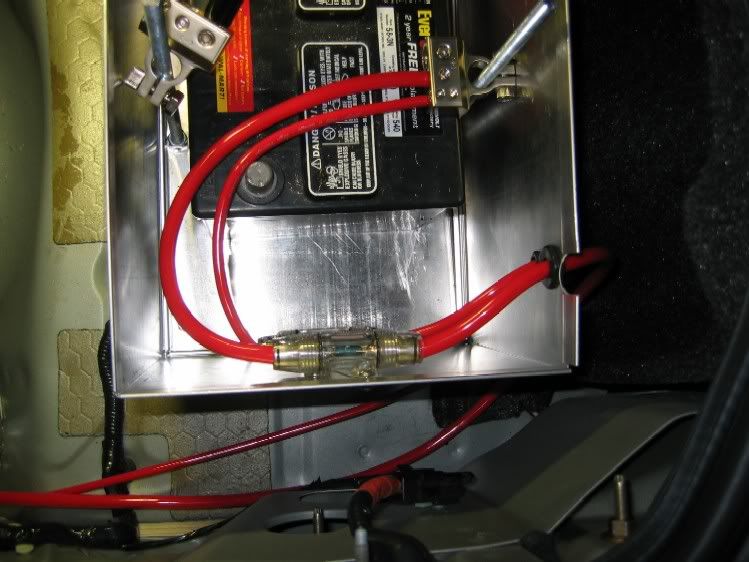
Here's the battery end 125A fuse installation (before I installed the 1/0 cable from the battery terminal to the solenoid).
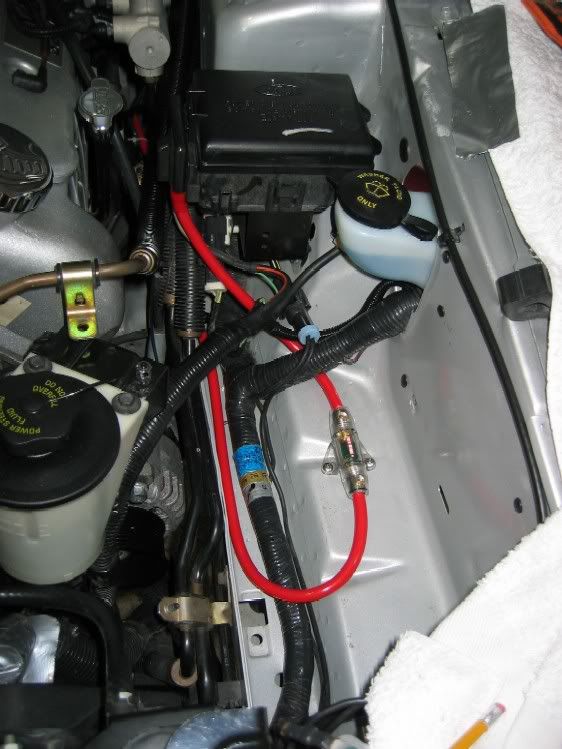
Here's the other 125A fuse installation.
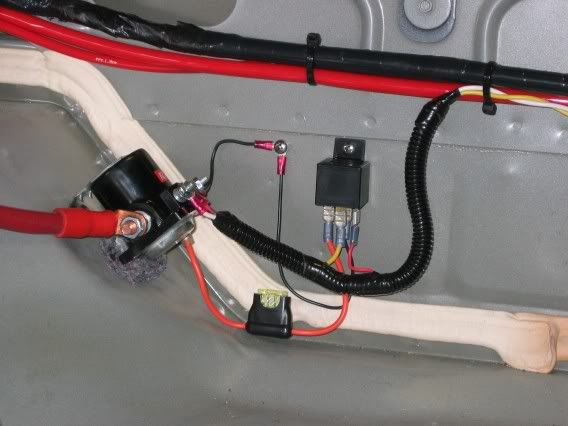
Step#5: Wiring starter relay & circuit....
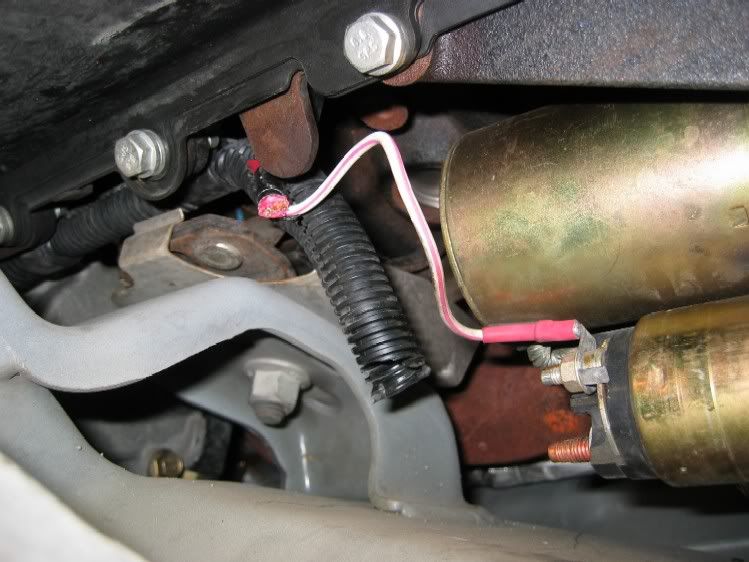
The yellow & white wires I ran above were for the starter circuit. This is where I diverged from the referenced diagram. I extended the existing starter solenoid circuit back to the relay to operate my own solenoid instead of tapping off the ignition. The OEM starter solenoid circuit is bundled with the OEM starter cable, so I just reused that section (to get to the starter) and spliced on my wires...you can find the OEM starter solenoid circuit at the power distribution box under the hood (white with red stripe wire). The yellow wire brings the "starter engage" signal back to the relay and the white wire takes it back to the OEM wire that leads to the starter.
Step#6: Don't be afraid to ask for some quality assistance....
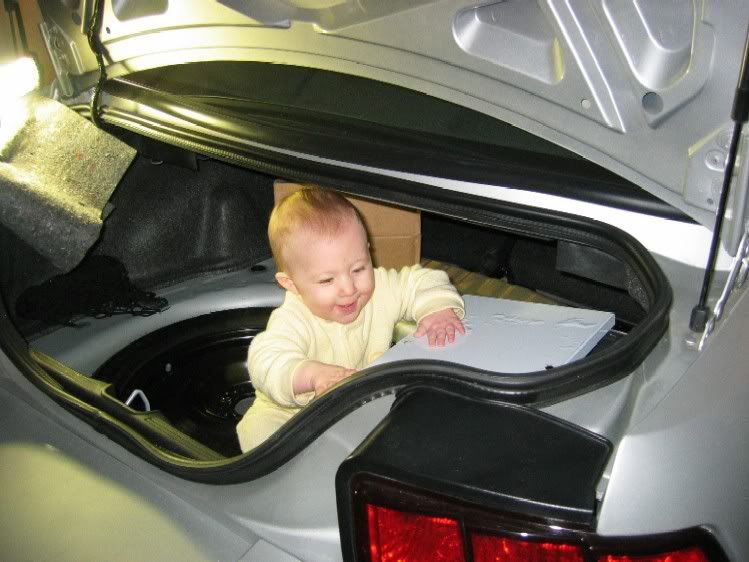
Hope I didn't miss any obvious details.
Here's the stuff I bought (with vendor & approximate prices):
- Taylor Battery Relocation Kit (Summit, TAY-48103, $121)
- Summit Remote Starter Solenoid Kit (Summit, SUM-G1750, $20)
- SWX Battery Terminal-Positive (Summit, SWX-BCPOS, $13)
- SWX Battery Terminal-Negative (Summit, SWX-BCNEG, $13)
- Streetwires 4AWG Ground Terminal (Summit, SWS-GT4, $12)
- Streetwires 1/0AWG Ground Terminal (Summit, SWS-GT0, $16)
- Streetwires 4AWG AFS Fuse Block (Summit, SWS-FH4AFS, $20)
- Streetwires 4AWG AFS Fuse Block (Summit, SWS-FH4AFS, $20)
- Streetwires AFS 125A Fuse (Summit, SWS-FH4AFS, $8)
- Rubber Grommet Assortment (Summit, SUM-W5214, $10)
- (4’) Stinger Pro Series 1/0 AWG Red Cable (Hifi, SPRO0R, $10)
- (2’) Stinger Pro Series 1/0 AWG Black Cable (Hifi, SPRO0 , $5)
- (30’) Stinger Pro Series 4 AWG Red Cable (Hifi, SPRO4R, $30)
- (10’) Stinger Pro Series 8 AWG Red Cable (Hifi, SPRO8R , $5)
- Stinger Pro Series 4 AWG Terminals (Hifi, S4PRG , $4)
- Rubber Grommet Assortment (Summit, SUM-W5214, $7)
- Assorted Screw & Fasteners
- TOTAL: $320
Hifi Sound Connection Website
Summit Website
I wired the system using the "Not for Racing" DIAGRAM as a starting point...with minor changes as indicated in the text below.
Step#1: Mounting the box....
The first step is to carefully select your box location in the trunk. I took about an hour to carefully map my location to make sure I would not penetrate the gas tank when drilling holes. This show shows where my threaded rod would be located.

This shots gives you some idea of where I located the rods, dimensionally. To attach the nut on the rod closest to the spare tire (a real SOB), I taped the nylock nut into a wrench and had my wife fish it up under the car until I could see it thru the hole. Then I threaded the rod into it.

You will note that I tucked the grounding point behind the box. I had to trim the trunk panel a smidge to fit around the 1/0AWG ground.

Here's the completed box installation. You can't quite see it, but I ran the vent tube thru the grommet just forward of the box.

Step#2: Removing OEM wires....
I cut the OEM battery/starter harnesses away and reconnected the OEM ground cable to the new grounding point, which I mounted next to the power distribution box under the hood.

I cut and abandoned the starter cable in the loom...its impossible to remove it because it is taped to other conductors the length of the cable. This will now be a dead cable, so there is no concern with electrical safety.

This is the 4AWG ground terminal.

This is what the old battery location looks with the ground installed, but the new power wire yet to be installed.

Step#3: Running starter cable & mounting solenoid....
I knew I wanted to mount the solenoid in the spare tire well...and I wanted to the ability to put the sapre tire in for extended trips, so I ran the 1AWG starter cable around there. This let me use the IRS bracing on the other side of the trunk metal for support. The reason I used the Taylor 1AWG is it is *stiffer* than typical car audio cable so it could be trained to hug the under side of the car and not flop into the exhaust or other dangers.

I just followed the OEM fuel/gas vapor lines to the starter and used some "flame guard" near the mufflers for extra heat protection.

Step#4: Running charging cable & mounting fuses....
I ran the 4AWG cable to the front of the vehicle as follows. The 8AWG cable coiled up there is for the future BAP installation.

Rear seat area.

Thru the kickpanel.

Thru the wheel well.

Final wheel well installation.

Here's the battery end 125A fuse installation (before I installed the 1/0 cable from the battery terminal to the solenoid).

Here's the other 125A fuse installation.

Step#5: Wiring starter relay & circuit....
The yellow & white wires I ran above were for the starter circuit. This is where I diverged from the referenced diagram. I extended the existing starter solenoid circuit back to the relay to operate my own solenoid instead of tapping off the ignition. The OEM starter solenoid circuit is bundled with the OEM starter cable, so I just reused that section (to get to the starter) and spliced on my wires...you can find the OEM starter solenoid circuit at the power distribution box under the hood (white with red stripe wire). The yellow wire brings the "starter engage" signal back to the relay and the white wire takes it back to the OEM wire that leads to the starter.

Step#6: Don't be afraid to ask for some quality assistance....

Hope I didn't miss any obvious details.

